Cradle Pegs

When I was designing the cradle I went back and forth about what I would use for the though tenons.  I really like the look of through tenons and found quite a few options I responded to, but they were all linear spikes that didn’t feel right with the curves of the cradle.  I decided I needed to come up with a curved, or rounded tenon.  I also wanted to create one that would be easy to take in or out when the time came.

Sketchup was certainly my friend on this project:

Sketchup

My Sketchup helped me realize the head needed to be curved.  My sketchup skills however were not going to allow that!

Once I was happy with the design I needed to approach the one tool in my shop that I had yet to even come close to perfected–the lathe!

I started by glueing up two pieces of walnut.

I started by glueing up two pieces of walnut.

Cradle peg02

Next I headed to the nearly unused lathe to start to rough my stock

Next I headed to the nearly unused lathe to start to rough my stock

Based on the lines I roughed in--the pegs actually began to take shape.

Based on the lines I roughed in–the pegs actually began to take shape.

Cradle peg05

As I got closer, I cut the pieces down in order to create a smooth curved top for each.

As I got closer, I cut the pieces down in order to create a smooth curved top for each.

Dance of the Wooden Soldiers

Dance of the Wooden Soldiers

Next I headed to the band saw in order to cut the pegs  cleanly in half.  I don't use these wooden clamps often  enough, but sometimes they really come in handy!

Next I headed to the band saw in order to cut the pegs cleanly in half. I don’t use these wooden clamps often enough, but sometimes they really come in handy!

and then there were eight...

and then there were eight…

I had the cutest of shop assistants help me sand each of them down.

I had the cutest of shop assistants help me sand each of them down.

I laid each tenon out in order to trace out the mortise.

I laid each tenon out in order to trace out the mortise.

Cradle peg13

This made for a snug fit!

This made for a snug fit!

I must say this was really the 1st project that I had created using the lathe.  I am no turner (yet), but can see how the lathe and what I can create with it will begin to be in integral part of my designs and woodworking experience.

Thanks for stopping by the shop.

Advertisement

The World’s Most Expensive Dowels!!

Yesterday I took the afternoon off and headed up to our house to do some projects in my shop.  I had some sanding to finish up on the loft beds I’ve been building, I built some drawer spice holders for my brother and I made some dowels from scratch.

The drive up the parkway is beautiful. The temptation to speed is great.  But given all my tickets, I usually set the cruise control and glide along. Usually, but traffic was flying. You know the theory about if you drive with the traffic you won’t get pulled over?  Well that was just disproven.  Speed trap+ 20 cops + 80mph = another ticket.

But more on that, back to adventures in woodworking…

I designed some dowels into my latest project and was quite proud of myself, for incorporating a new technique, new to me at least.  But it is funny how we absorb information.  Part of me had it in my head, that I had somehow come up with it on my own.  Anyway, I finally took out the Lie Nielson Dowel making plate I had bought last year (it was was one of those purchases that I added on to an order and thought “I really need this!”) dusted it off and made a little jig.  I struggled a little bit as my pieces weren’t small enough, and I ended up breaking a few.  So I did what all good modern woodworkers do, I hit the internet.  Googled Lie Nielson Dowel making video and there popped up Marc Spagnuolo and his video on Drawboard Mortise and Tenon.  Damn!  How do these ideas get in my head!!!  Oh right.

Back to the bench I cut my maple pieces down to a more realistic, manageable sizes.  I then broke out my block plane and took the corners off.

dowel 1

Next I cut those pieces into 6″ lengths. I learned earlier that a longer piece has a greater chance of breaking as it gets hammered in.

Dowel 3

I used my leather bound mallet to drive the pegs through the holes and voilà!  I made a dowel!

Dowel 5

Proud of myself, I emailed my wife to show her pictures. She responded back: “The worlds most expensive dowels!”  She was right,  by the time you add up the 280 miles round trip worth of gas, the speeding ticket, the lawyer to get out of the ticket, and of course all the tools I “had to have”, well yes I guess those are some pretty expensive dowels.

Dowel 4

Did I mention I also built a spice rack?

Spicerack

Said Spice Rack.

Here’s another great video on dowel making and a nice jig.

Thanks for stopping by the shop.

Pay It Forward: Get Woodworking Week

It goes without saying that I love woodworking and spending time in the shop.  But with a busy work schedule and an active family it’s not always easy to escape to the shop. Sometime I need a little push to get going (especially If I didn’t clean the shop last time!).  Well Tom Iovino started Get Woodworking Week a while back to get us all motivated to get into the shop!

GWW13

I love my shop and the arsenal of tools I’ve been able to collect.  I’ve been fortunate enough to be able to afford a wide variety of toys tools.  It recently occurred to me while reading some forum post that not everyone who wants to “Get Woodworking” can.  Perhaps you are in school, you’ve been laid off, or well, tools just aren’t in the budget.  I’d like to help.

My father recently gave me some tools out of his garage.  There is circular saw, a jig saw, a hand sander, two drills and a hand saw.  The sort of things you might pick up at a garage sale.  These aren’t exactly Festool, but it will get you going.

Tools

I’d like to offer these to an aspiring woodworker, free of charge, to pay it forward.

Send me a note letting me know why you, or someone you know, could use some startup tools.  I don’t really want this to be a contest, I just want the tools to get into the hands of someone who needs them and will use them.  I’ll post your email here, but keep your last name between us.

All I ask is that you eventually build something for someone (to pay it forward) and send me a picture.  I will also throw in a $50 gift certificate to Woodcraft to sweeten the deal!

I’ll cover the shipping, but I have to limit this to the folks in the US.  I’ll choose someone Feb. 11th!

What do you say?  Send me a note below & Get Woodworking!


A Hobby Hiatus

It’s been well over a month since I’ve hit the shop and it’s been at least two months since I’ve posted something here. I’ve been feeling guilty.

I’ve been blessed with a ton of work, lots of family time lately and we just returned from a long overdue vacation, not to mention the holidays.  Life is good! So why am I feeling guilty?

Chris Schwartz seems to have a new blog post in my inbox daily. Marc Spagnolo and Shannon Rogers post lessons nearly every week. Pros like Chris Wong or Rob Bois seem to not only crank out projects at an alarming rate, they somehow have the time to blog about them. Then there are all retired folks posting their recent triumphs. Why can’t I keep up with any if them?

Then I have to remind myself– they do this for a living (or now have their retirement days to enjoy), I do this as a HOBBY!! The moment it becomes overwhelming or stressful, its not a hobby anymore. When I tell people I do woodworking, the first words out of their mouth is “where do you find the time?”  At the moment I find myself asking the same question!

It is true that I usually have a ton my plate, but that is one of the reasons I deciding to pursue my interest in woodworking– stress relief! I love being in the shop and getting in the zone.  There is nothing like it.

Life is full and sometimes you just have to prioritize. Sometimes you need to take a break, a hiatus if you will.  Our recent  family vacation was long overdue.  The whole family just needed a break. All of us returned so energized and ready to conquer the world! I guess you even need to take a break from your hobbies.

Hopefully I can end my Hobby Hiatus in the following weeks and get back “work”!!

These are the people in my neighborhood…..

The Austerlitz Woodworker’s Show came as all things do, very quickly. My shop was quite full and quite active.  You remember I had an offer by an 8 and an 11 year old to ‘help’?  Well who could turn down help like that?  Their enthusiasm alone filled the shop.  I put my work aside and with the help of their mother, worked on turning pens and ice cream scoops!  What could be better?  I was able to put the finishing touches on the console table and build an ipad stand to display my work, I tried to squeeze in time to finish the shaker table but that just wasn’t going to happen.  I took a deep breath and said to myself “it’s all good, do what you can.  This is my hobby and I have to enjoy it.  No pressure!”  The rest of the day was fantastic, as my son and daughter taught us a thing or two about turning!

Austerlitz is very fortunate to have a thriving Historical Society which owns a 20 acre parcel of land that is the home of the Old Austerlitz Village. The village is a “living history museum of post-and-beam houses, a granary, a blacksmith shop, a one-room schoolhouse, a Christian Church and other historic buildings.”   The latest is a newly restored barn, which was raised just in time to host the show.

The ‘new’ barn.

Clark Olsen’s amazing screen and chair

I loaded in the morning of the show and but wasn’t able to fit into the barn.  So instead I shared the granary next to the barn with master craftsman Clark Olsen.


This town certainly houses some impressive talent!  The show consisted of 11 professional woodworkers and four hobbyists, all extraordinary in their own way.  The variety alone was was impressive, running the gamut from cabinetry, marquetry, classic shaker, windsor chairs, toys, furniture, even whirligigs.  Something for everyone!

Falling Water work by John Dunne

John Porritt taught me a thing or two about Windsor Chairs

I got an introductory lesson in marquetry from Herb Cook.

Clark Olsen’s Music Stand


The best part of any woodworking show is the camaraderie.   Woodworkers are the kindest, most giving folk you will ever find.  That has never more true than in Austerlitz.

What’s a show without whirligigs!!!

The Lighthearted Woodworker….

It was an terrific day. Very inspiring.  I met so many great and talented people, not only fellow woodworkers, but people from this amazing community.  I wish I had taken more photos and had time to chat with more people, but you can only squeeze so much into one day.

I wanted to mention all that attended and really extend my thanks for welcoming me and for your generosity.

The Woodworkers of Austerlitz: Jeffrey All, Reggie Brantner, Herb Cook, John Dunne, Randy Ezinga, Tim Hawley, Dick Light, Scott Mesick, Chris Landy, Clark Olsen, Brian Polhemus, John Porritt, Howard Reznikoff, Steve Somlo and Michael Walters.

Max and Samantha manning the booth.

I would be remiss if i did not point out that not only did Max and Samantha hold down the fort while Daddy was off being social.  They also sold all of their turned bottle stops!!

Twin Cradle Series, Part 3.2 : Failures and Fixes

-Through Tenons; Mortise failure/solution

It was not until I went to cut my mortises that I realized I should have laid these out and cut them before I cut my board into an oval, with no straight edges to register a cut. To make matters worse, the mortises were angled at 12 degrees to receive the headboard and footboard.

Attempt at chiseling out the mortis

Attempt at chiseling out the mortise

It was my intention to use a chisel out the mortises. I started on one and failed. In hindsight, I am not sure what I was thinking. It took me forever and I ended up with blow out on the bottom despite my best efforts. Ugh.

The result of my chiseling = Blow out on bottom side

The result of my chiseling = Blow out on bottom side

Plan B: Drill holes for my saw


I then went to plan B. I drilled out holes and rough cut the mortises with my skill saw. This seem to do the trick, at least at this point of the process. I then went in with my rasps and snuck up to my layout pencil line. At least I thought I did, there were places that I ended up over compensating as I was trying to dry fit the pieces.

Perhaps overkill: I used my jig saw to cut the mortises.


As my hand tool skills have refined since, I believe I would now go in with a small saw, perhaps a keyhole saw.  But my Jig saw certainly kept me moving.


**If you’re reading this and nodding your head (up or down), I’d love to hear your feedback on how you would approach some of the tasks I struggled with.  As with all things woodworking there are infinite ways to skin a cat, and we can all learn by sharing our experiences.

Knot The Right Epoxy Fill

I love me knot….

I am a huge fan of knotty pine, and I am always looking to see how I can incorporate the knots into my layout. I have not, however dealt with the knots properly, until now, well almost.

How beautiful is this–Knot!


(I have more knot knot jokes, but I will save them for another post.)


Ugh. Nice Job, Genius.


The 1st ‘epoxy’ I purchased was from the local hardware store.  It was a grey paste. I am not sure what I was thinking as I applied it. Did I really think this was going to sand out and look anything different than a cement patch? And yet I proceeded.


Obviously I was not happy with the outcome. I moved on, but I tried another epoxy, this time a clear product (makes sense, huh!).


Better luck, but I still wasn’t thrilled with how it sanded out.  I need to try West Systems Epoxy and spend a couple hours experimenting with it.


Thanks for stoping by the shop. I’d love to hear your comments and thoughts on how you might have approached things differently!

The Do’s and Dont’s of Yesterday; Divide and Conquer

I recently picked up a 1st edition copy The Do’s and Dont’s of Yesterday by Eric Sloane at a flea market for a buck.  I have always been a huge admirer of his writing and his amazing paintings and illustrations of the american landscape and the folklore that created it.  His work has always spoke to me. For as long a s I can remember I have enamored with barns.  The massive shapes, the intricate joinery, their varied uses.  Truly one of the most beautiful and honest forms of architecture.  Eric Sloane chronicles so much from the working past of our country, through his art of barns, tools and anecdotes.  In this book,  he highlights the latter.

While this book is a quick read and more of a coffee table book, I thought it would  be fun to share some of the Do’s and Dont’s as they pertain to woodworking.  As the sub title suggests, they really are a Treasury of Early American Folk Wisdom.  Enjoy.

Do divide anything into any number of parts by using a ruler. By simply slanting your ruler and still using the inch measurements, you can get even more accurate measurements than using arithmetic.  For example, it seems difficult to divide a board ten and three-sixteeenths wide into six parts. But by slanting a one-foot ruler from one side of the board to the other, and then dividing the twelve-inch ruler into six parts, you solve the problem without arithmetic.

-Eric Sloane

© Eric Sloane

Learning to Read the Grain

I was fortunate enough a few weekends ago to take a class at the New Legacy School of Woodworking with Paul Sellers.  Paul has been getting a lot of attention here in the states lately, as he has recently open up a branch of his school in Greenwich, NY.  I was very excited about this news, as its only an hour drive from my shop upstate.


If I would have to put a label on myself, I would like to be considered a hybrid woodworker. Perhaps a more accurate label might be a power tool guy with an interest in hand tools.  That is until this weekend class.  As many of you probable know- Paul is a hand tool guru.  He is on a mission to bring hand tool skills to a new generation.   I must admit, as enthusiastic I was about taking the class, I was not expecting to be converted.  Paul makes a very strong case for the ease the use of hand tools over power tools.  In fact, one of the things that he talks about first is that hand tools are just that: tools, while power tools are not tools at all, but machines.

New Legacy is located on gorgeous piece of property in Upstate NY

The whole tone of the school is set as you drive onto the serene property, park and cross a a small footbridge and head to the newly constructed post and beam barn.  They have really done a spectacular job.  How can you not be inspired working amongst these massive beams with magnificent joinery?  We had three spectacular days that allowed the barn to be awash with natural light.

If you don’t know Paul or his work you should definitely explore his blog and check out his videos on You Tube. His book and DVD series will certainly give you an idea of the class structure and his approach to teaching.  But do not be fooled there is nothing like sitting in a class with a master craftsman with the ability to soak up information!  A note about the DVD’s:  I have read comments about how the graphics are over a bit over the top and it’s over produced, but I gotta tell you, as a guy who has slept through countless woodworking DVD’s I appreciated the effort, it keeps me excited and I am sure it will entice my children into watching it.

My box carcass

I took three day Woodworking Essential I class, part of a nine day series.  The project was the Shaker pine candle box.  A great skill building project.  While it may seem a simple project, like many classes, it’s about building these foundation techniques and not about the project.


Here are just a few nuggets I picked up along the way:

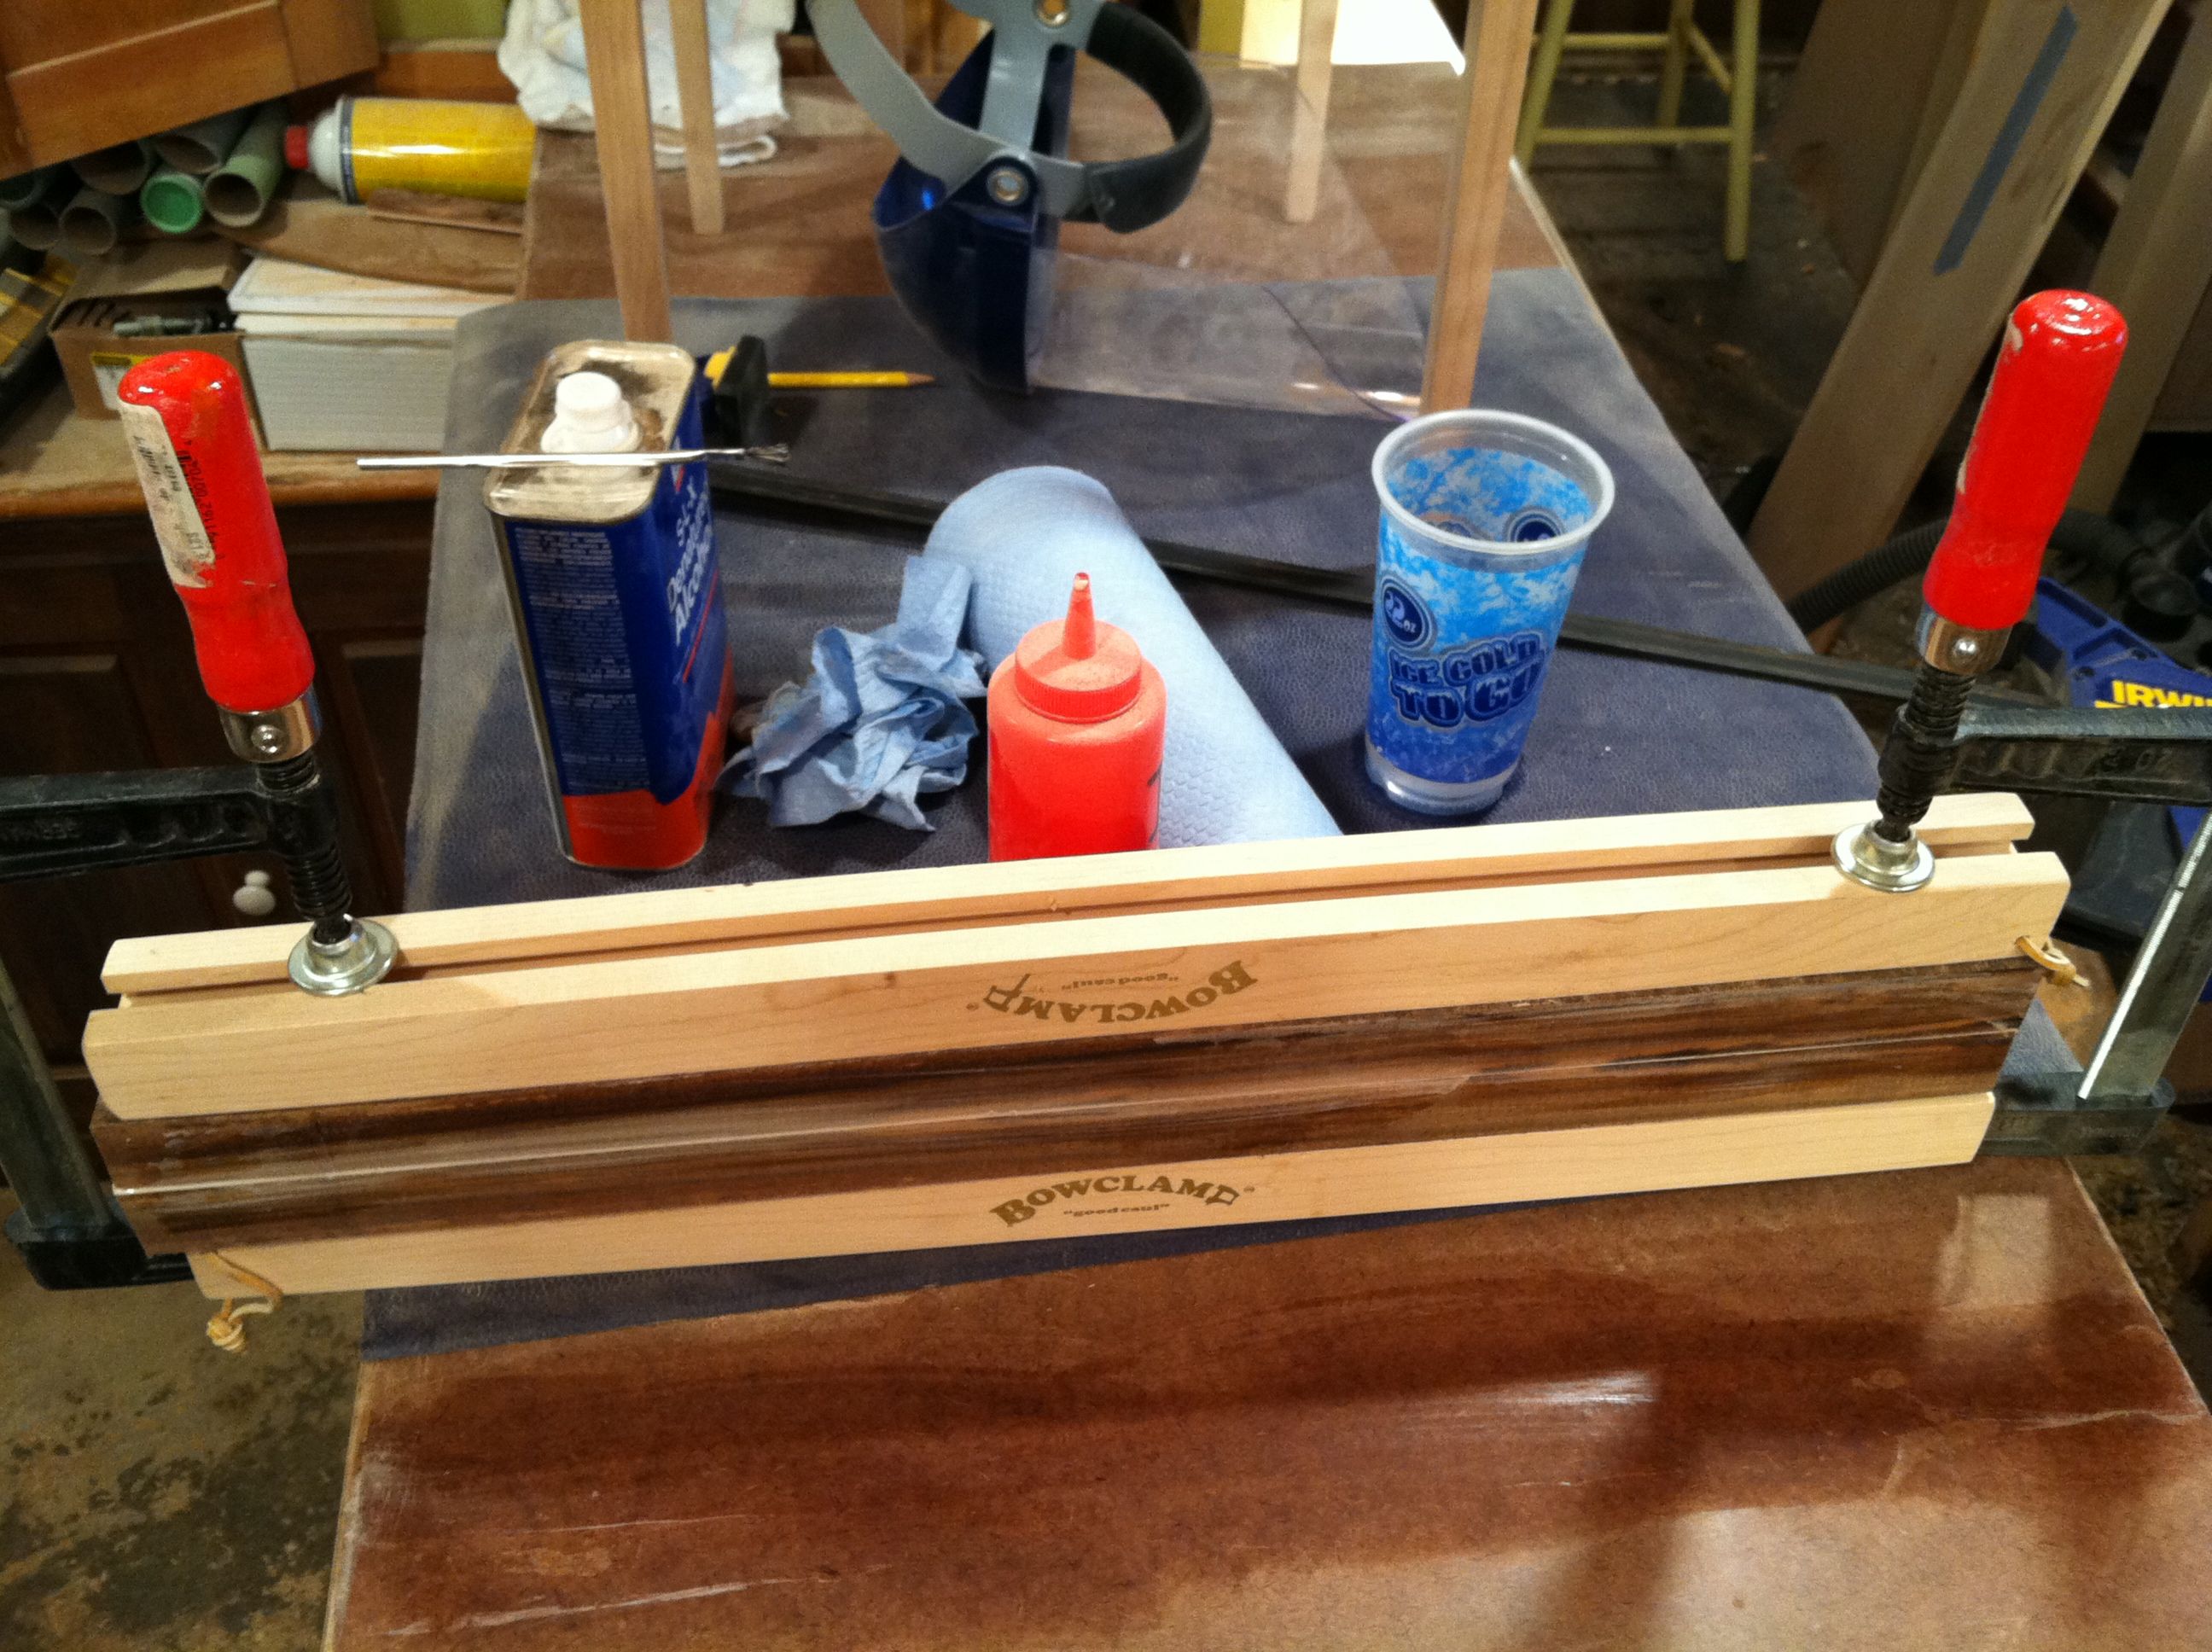
A great technique for planeing dovetails:  The board is placed under the box in the vise, creating a slight bow on the surface.  The plane is approached from the outside and prevents you from reaching the dovetails on the opposite end and creating tearout.


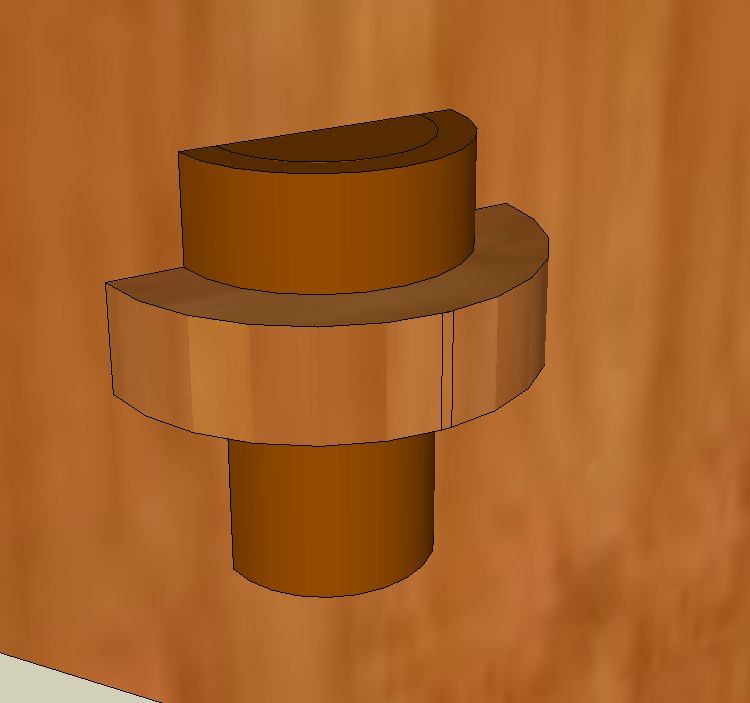
While it seems simple, center the box on the base isn’t always.  By laying out 45° pencil lines at each corner you can quickly and easily eyeball your box evenly on the base.


What a difference! My sawing technique has come miles!  I now understand how to gently approach the wood and let the saw do the work. Paul explained saw sharpening, how the teeth are set and the real difference in steel, teeth and the set.  Real eye opening.  I’ve already come home and dove right into learning all I can on saws and sharpening.  Something I didn’t really expect.


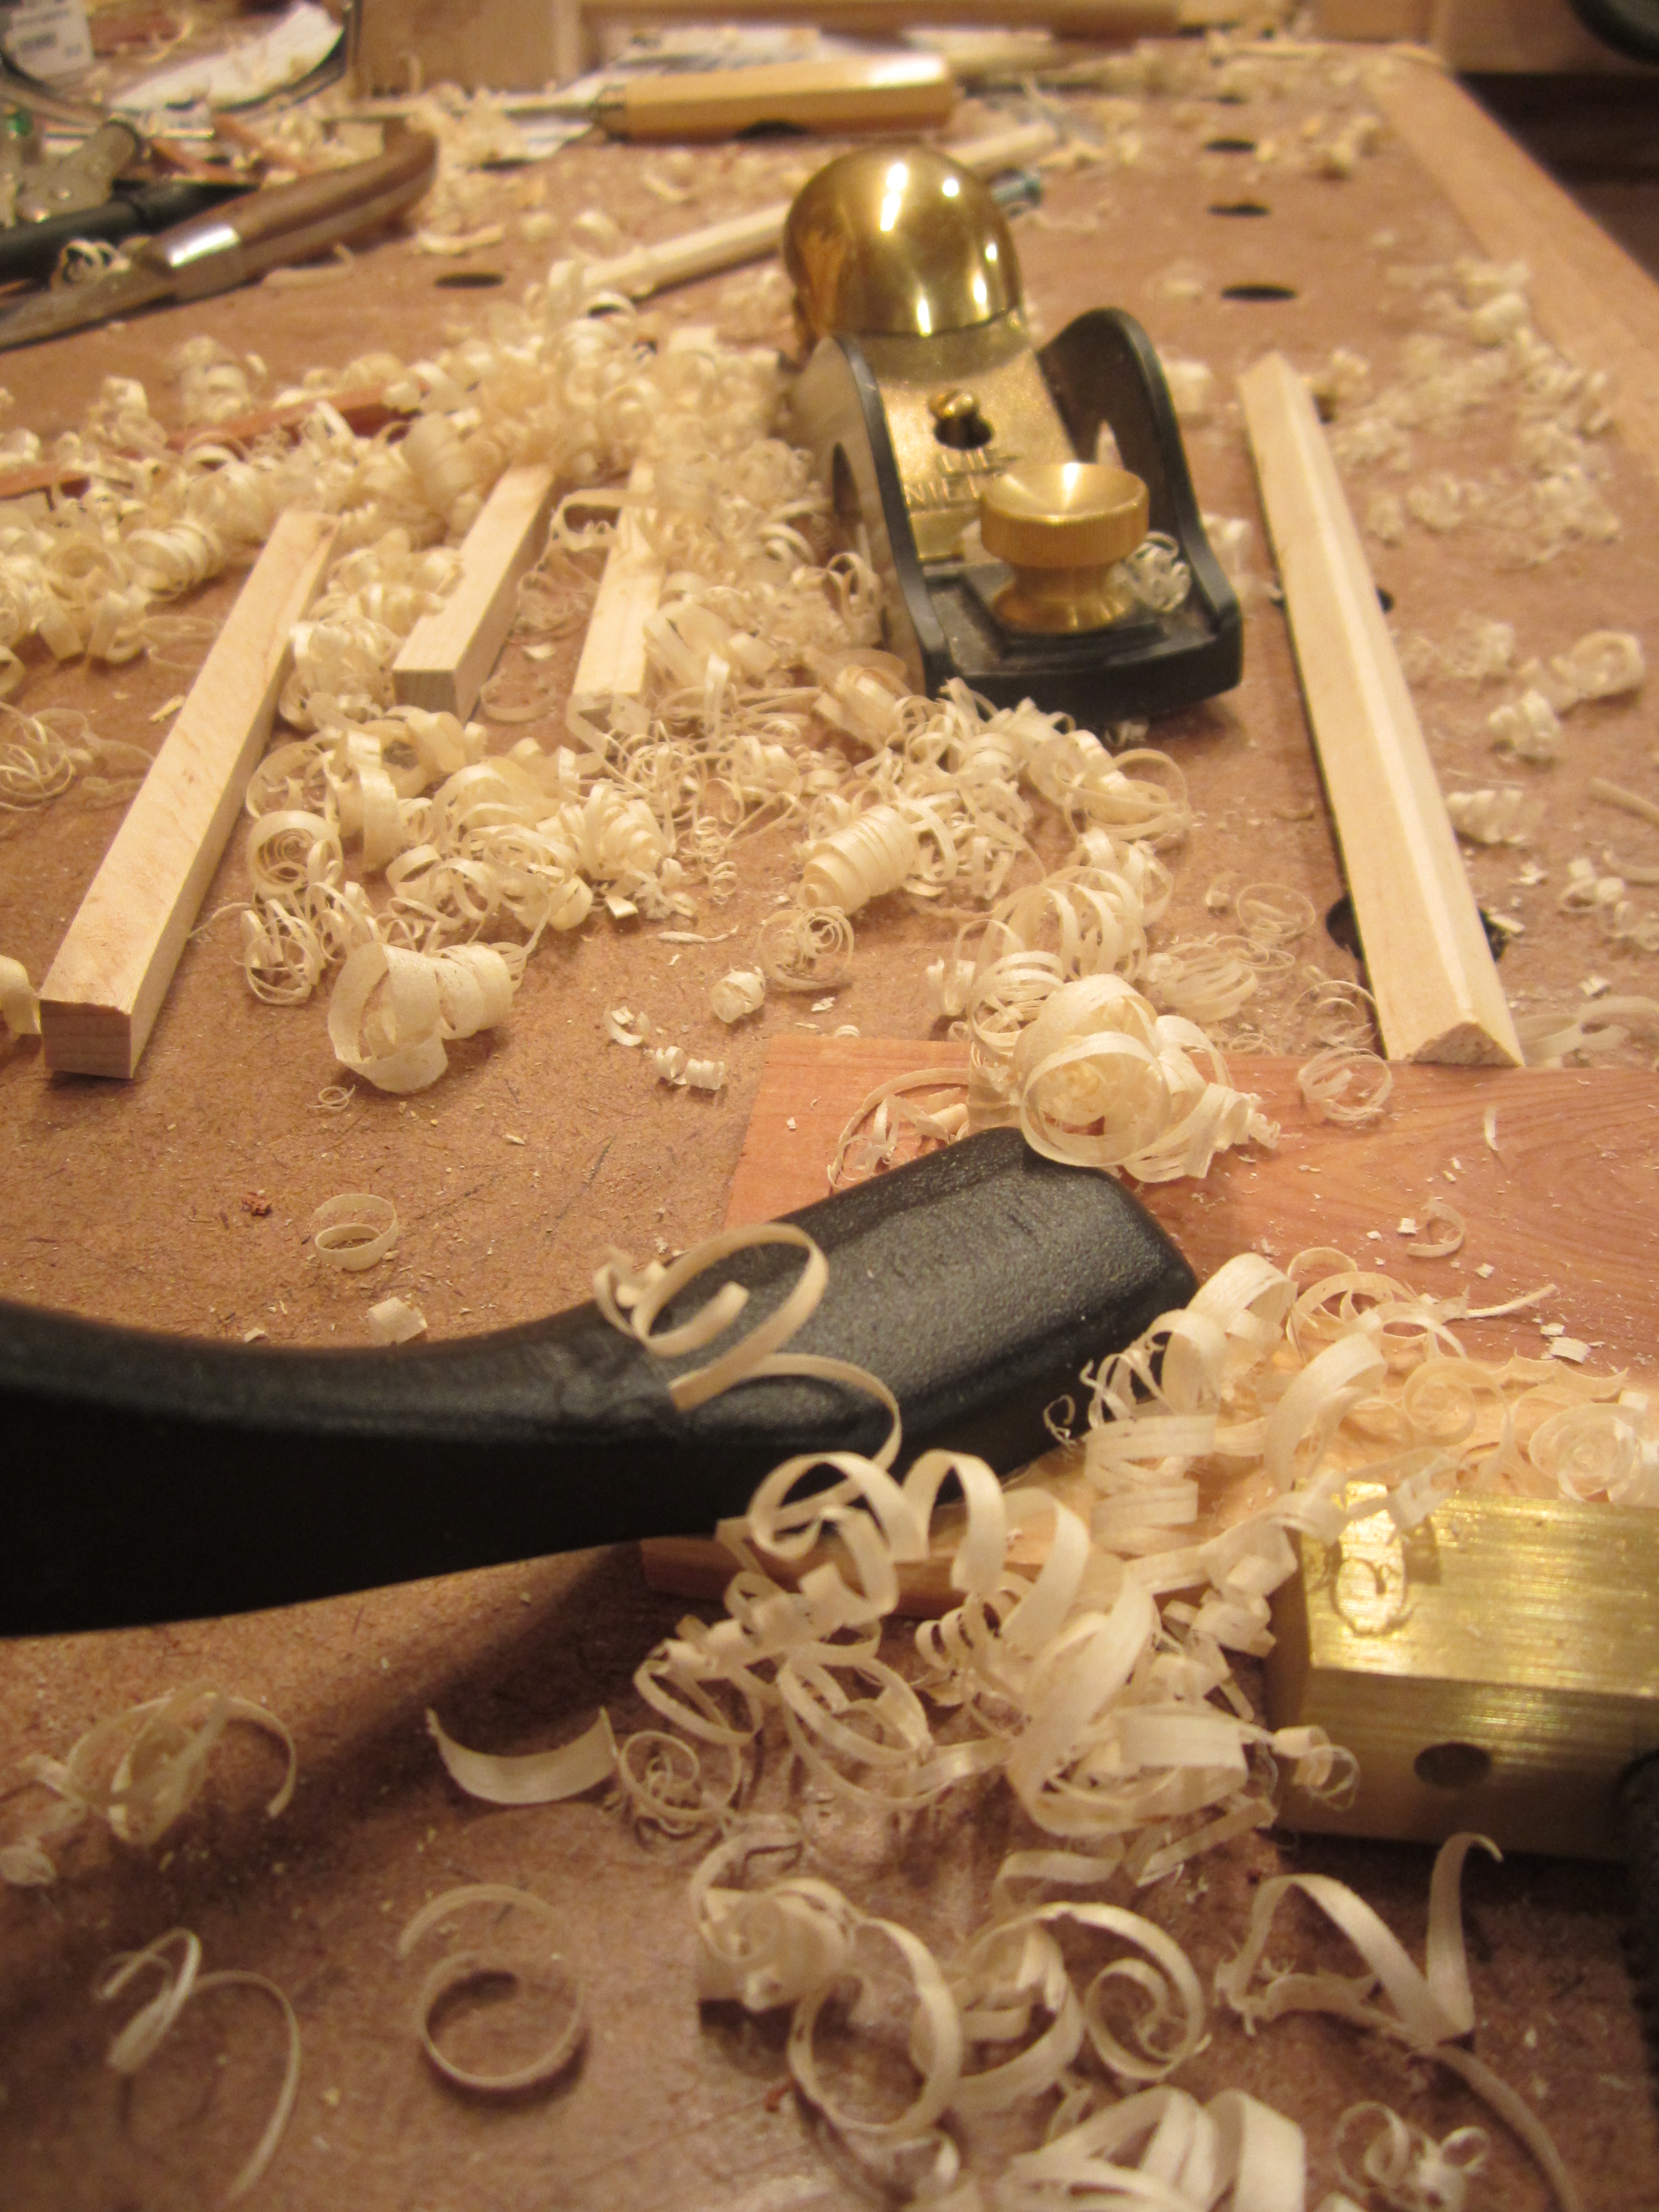
My Hand tool technique has also grown.  Paul will tell you you can do anything with a Stanley No. 4.  and he sure can!  I am now very comfortable with my planes and really understand what a small adjustment in the tool can make, what to look for and what to listen for.  My shavings are a joy.


I really walked away with so many positive techniques and things to ponder.  One of the most important things I think I took away was a real appreciation of how to read the grain.  There is definitely something about hand tools that puts you in touch with the wood that machines just can’t.  While I would not say I am posting my woodworking machines on Craigslist just yet, I do see how it will change my woodworking experience. I have so much more confidence now when I reach for my dovetail saw or my No. 4 plane.*

Paul has certainly had an influence of how I approach the wood. It is so much about listening to the wood and feeling the tool slice into the grain at the proper angle and with the right touch.  Before I would take such an aggressive approach that it would be impossible for me or the wood to react properly.  Paul has a very logical approach to his teaching, throwing out antidotes while he carves a spoon in the time it takes you and I to choose which tool to use, making it appear to be the simplest of tasks. I think that is truly what is so unique about Paul’s approach: he keeps everything simple. From teaching with  pine to primarily working with a no. 4 plane and small selection of tools.  But don’t think for a moment this is a simple man, he is a master craftsman with a keen eye, a serene demeanor and a hearty work ethic.   He is on a mission to pass on skills of the past, and make them skills of the future.

*Full disclosure.   I purchased a Stanley No. 4 Plane and a 1871 Disston Saw on Ebay the next day.